Pages

Showing posts with label DIY. Show all posts

Re-make of an Old Favorite

Monday, August 27, 2012

Have you ever mistakenly created a work of art?  I did just that when I painted this old table...
 
 
The stain that I used over the CeCe Calwell's paint soaked in so quickly and completely changed the color of the paint and I LOVED it! 
 
However; since that was not the look that I was going for originally, and I created it just by happenstance, I have been wondering weather or not it was possible to create this look again.
 
Unfortunately, that beautiful table has had a rough life and no matter how hard we tried, it is still very crooked and wobbly so was I was unable to sell it.
 
My mom gave me this cute little table to makeover and I thought it would be the perfect test to see if I could recreate my precious table.


I am very happy to say it worked! 


I simply painted one coat of CeCe Calwell's Santa Fe Turquoise the key to get this look is to not be exact with your brush strokes, make strokes in all different directions and don't try to go for too much coverage.  After it dried I lightly sanded a couple areas that I wanted to be more effected by the stain, then I put my dark walnut stain on a cloth and wiped on and then wiped it again with a clean cloth. 
 
Usually, I am very careful about using stain because it is quite hard to correct a mistake.  That makes this project even more fun because you can put as much or as little stain on your rag and just go to town.  Don't over think it or let the perfectionist side of you come out...just go with it and see how amazing your finish project looks!
 
Here's a view of her top...


And now her legs...

CeCe Caldwell's Paint, stain, Turquoise, DIY, Table
 
Aren't they beautiful?! 
 
 
My goal for the finished look of this table was a messy, unique and striking piece of furniture. 
 
What do you think?  Does the imperfection make this piece noticeable or just make you nuts?

3rd Times a Charm!

Monday, July 2, 2012


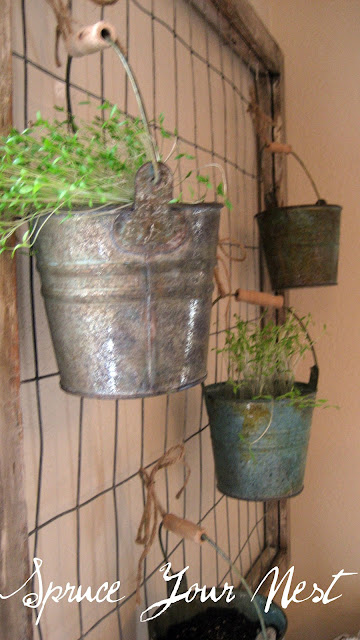
My dear old gate a two time project fail finally found its place in our home, well actually outside our home...

buckets, gate for flowers, porch

I first thought that the perfect use for this gate was to plant some herbs in our dining room...

herbs, pots, gate

Well, that didn't go so well...they didn't get enough sunlight and stayed too damp in their pots.  They ended up looking pretty much like that lovely bottom bucket ;)

So then I tried to just plant some little shade flowers, but those too, became an ultimate failure!

The main problem to these adorable little pots is that they held way too much moisture in and I knew the only solution would be to drill some holes in the bottom to allow for some drainage which was not about to happen with them hanging in our dining room...

So the perfect solution was to hang this old, tattered, beauty outside when we did our backyard makeover!

I was almost scared to show them at first, thinking that I would of course kill whatever I planted with my black thumb again, but I am happy to report that the little red petunias are loving their new home!


It only took 5 months, but finally my third attempt really is a charm!!

Linking up here.

How to Make an Outdoor Rug from a Tablecloth

Friday, June 15, 2012

So now that I showed you our new backyard, it's time to show you some of the details.

As you know from my Pinterest Inspired Bathroom, I absolutely love trying out new projects to see if they are all they are cracked up to be, and today's post is no different.

I talked about some outdoor flooring ideas that I loved in one of my very first blog posts here, and I have been dying to try the outdoor rug project.

I actually bought a clearance table cloth from Target that I loved last year in preparation for this project...I certainly didn't realize at the time that it would take a year before we started on the back yard.

I used her same method of simply rolling on some water based polyurethane...

outdoor rugs, tablecloths, target

I coated the underside of the tablecloth first and let it dry and then did 2 coats of poly on the top side.  I had exactly the right amount of poly in this can.

It got a little bit more stiff and I can wash it right off when the dogs and kids get it dirty! 

It is a perfect solution for an outdoor rug! 

tablecloth turned outdoor rug

This rug cost a total of $32 ($22 for the poly & $10 for the clearance tablecloth).  Outdoor rugs are quite expensive, especially if you want one with a pattern and there are so many colors and options to choose from in tablecloths, it is a genius solution!

I'll be sharing this post over at Mom's Fun Money and linking up here.


We Have a New Backyard - Phase 2!!

Sunday, June 10, 2012

Our backyard is almost complete!  I am so excited to share how far we've come in the last week!

In case you missed it, you can catch up on the before here.


Pretty amazing transformation if I do say so myself!

Okay...not quite...remember we are on a budget guys!  This is our friend's beautiful pool where my husband installed some amazing lights :)

Here is our real backyard...


We still have a little ways too go, but it is a far cry from where we were a week ago...


I'll be sharing some more details soon and the final pictures when we finally finish!

Linking up here

New Backyard - Phase 1

Wednesday, June 6, 2012

So I always tell you that when there is a lag in my posting it is for good reason...it is no lie!

We have been so busy on one of the biggest projects we have done.

After a year of renting this house we are finally getting a back yard!!

Just in case you couldn't tell from all the exclamation points, I am really EXCITED!!!!!

This is why we haven't had you over for any grand parties or BBQ's this past year...


Just gorgeous right?! 

Thanks to good friends and family and of course my amazing husband who might not be as fond of me at the moment ;-) we are really getting somewhere...


Can't wait to show you more this weekend!! 


On second thought...who really needs a lawn after all?


Identical or Fraternal Twins...

Wednesday, May 30, 2012

Today's post is a followup to last week's chair post. 

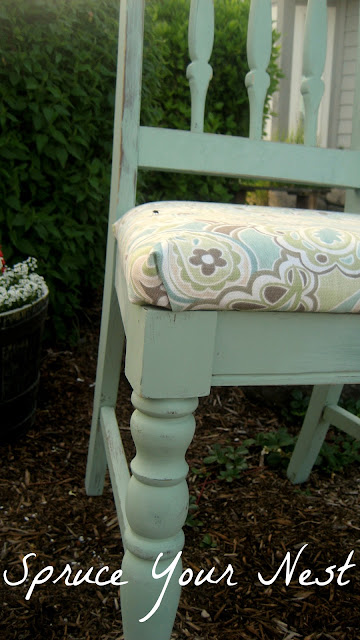
I finally got around to painting the second chair and decided to go a little different route with this one.


I originally planned to paint this chair exactly like the other one, but then decided against it.  I  picked a complimenting fabric and color so that they could be used together or separately.


In case you didn't catch the before here is a refresher...


So what do you think?  Do you prefer identical or fraternal twins? 

If you haven't already done so...don't forget to sign up for the fabulous giveaway that ends on June 2nd!

You get to pick an item of your choice and help a great cause at the same time...


Linking up here :-)

Every Ride was Closed at Dinseyland!

Sunday, May 20, 2012

Oh how I love a good makeover!  Nothing pleases me more than finding a hideous piece of furniture that would soon be headed for the dump and to make it over into something that someone will treasure in their home.
My most recent makeover is just that (I hope)...

painting chair, reupholster, diy, fabric


I went to our citywide garage sale last month and had seriously been looking forward to this day like I was an 8 year old headed to Disneyland for the first time!  Unfortunately it was not what I had anticipated :-( 

It was like going to Disneyland with the thousands of people and every ride being closed for repair.  The streets were packed and I couldn't find ANYTHING.  It was beyond disappointing.  

Just as I threw a fit like a 2 years old and called it a day  we were headed home we passed two houses where I found a couple items that were perfect for my needs.  The first was this desk that I scored for $15 and the second were these 2 horrible chairs sitting that were destined for the dumpster.


I had been looking all over for a chair to redo ever since I remade these chairs and I couldn't resist the price tag of $5 for this ugly things.  I knew they had beauty hidden underneath.
I had sample pieces of fabric lying around that matched perfectly with a little sample jar of CeCe Caldwell's paint.

I still have one more identical chair that I am hopefully making over today to show you soon. 

Hope you all are having a fabulous and productive weekend as well!

Linking up here... and sharing this post over at Mom's Fun Money 

Old Vanity turned Desk

Tuesday, May 15, 2012

I spotted this old vanity at a garage sale with a price tag of a whopping $15 so I had to grab it!

It was pretty sad and cheap looking with a shiny top and a gold and yellow exterior.

It got a fresh, clean look with a simple coat of paint and a stencil...


Here she is before...isn't she a beauty?


The mirror was horrible and instead of spending hours trying to get the grime off, I decided to change it from a vanity to a desk with a little bit of chalkboard paint. 

chalkboard mirror, cece caldwell's paint, desk makeover

Now it is a perfect little desk that would fit nicely in any room. 


What do you think?  Do you like it as a desk, or do you think I should have kept it as a vanity?
Linking up here... and sharing this post over at Mom's Fun Money.

How to Find your Personal Style

Wednesday, May 9, 2012

Today I am going to share one of my biggest blogging and DIY struggles...

BEING UNIQUE.

I don't necessarily mean me personally, although that can often times come into play, but my projects. 

Before I was blogging I just went with my gut and painted things and decorated our home the way I liked and I didn't care what anyone else thought.  The down side to this is that sometimes, okay a lot of the time, I created some down right hideous things.  But you know what?  I loved them and that was all that mattered. 

I feel I have grown a lot in my tastes and talents from blogging and truly researching all the great ideas out there. 

However, I have realized that I often question my gut when it comes to making a color or design choice because it may not be the trend or my readers may hate it.

The thing is...someone will most likely always hate something I create, but hopefully there will be someone out there that will like it.  Either way, if I love it, that is all that matters.

I often find myself conflicted with what to create, especially now that I have started selling items.  I really start to second guess things when I compare myself to others and especially when something that I love sits for a while.  

For example, this hutch has sat for quite a while in my booth and makes me question my judgement...but it is a unique piece that will not work in every home.  I wish it went with all my decor because I would switch it out with my other Hutch in a second and that one would probably sell much more quickly. 


There are some things that I have transformed, like our dining room table that I am sure gets very mixed reviews...


But I have to tell you that this piece makes me so happy because I didn't listen to what logic was telling me, I just went with my gut. 

I have been trying to pin down my style this past year and I honestly cannot.  I love so many different things and I change my mind everyday from what my ideal home would look like.

Entryway Makeover Ideas 1[3]

I mean, really, who wouldn't want an entryway like Mandi's?!  The modern and cool vibe is just amazing!


Or what I would give to have Donna's stairs!  Everything in her home is so unique and amazing it makes me green with jealousy...yes I admit it 100%.


But then again, I love the tranquility and little pops of color at The Nester's Place, it gets me every time!

See why it is so hard for me to make a decision about my decorating style? 

I have always been one to love drastic changes.  I might just pick a style and then sell all our furniture and start over...well maybe in my dreams ;-)

For now, I will enjoy all the different styles in creating and let each piece of furniture speak to me and try to find my own creative vision for our home.

Styles and trends will come and go...I am choosing to decorate one day and piece of furniture or accessory at a time and only pick what I truly love, no matter what anyone else may think.


Side Table - From Trash to Treasure

Monday, April 23, 2012

I am absolutely in love with this little table after it's makeover! 


This was an old and abused table that my dear dad helped put back together for me so that I could make her over.  I almost told him it wasn't worth the effort, but I am so glad I didn't...


I used a little sample jar of CeCe Caldwell's paint in Santa Fe Turquoise and then did a top coat of dark walnut stain.

Sharing this post over at Moms Fun Money and linking up here.

Grey Dresser Makeover w/ CeCe Caldwell's Paints

Monday, April 2, 2012

I used a new paint from CeCe Caldwells  that I purchased from Mindy at Pretty in Paint and I must say I absolutely love this stuff!  A complete review will be coming in a future post. 

For this dresser I used Seattle Mist, Dustin Gulf Green and Spring Hill Green to create a fun look for any room...


I absolutely love the beautiful, light shade of grey of Seattle Mist and the subtle pops of color make it a unique and fun piece for any room.  


This post will be featured at Mom's Fun Money this week.

I will be linking up to these parties.


Dining Room Complete

Sunday, February 26, 2012

I realized after showing you my table makeover that I haven't shown you my completed dining room...

I have given you the low down on every project in this room, but now you can get the completed look :)

First we have the tea light wall art that I paired with a photo that was taken from our wedding {lemon drop martinis YUM}


On the same wall I have my gate turned herb garden and I am so excited to show you this most recent picture because my herbs are growing!!


Here is the completed look...


A far cry from this!  The black table, green curtains and white walls are GONE!!  Whoo Hoo!!


This post will be featured at Mom's Fun Money this week.

I will be linking up to here...


Thrifty Decor Chick