Pages

Showing posts with label spray painting. Show all posts

Ombre Chair

Tuesday, July 17, 2012

Ombre - Comes from the French word meaning shaded or shading.

I'm sure you've noticed the explosive trend of Ombre hair and fashion filling the streets of Hollywood.

Even if you weren't aware of the term Ombre I'm sure you've spotted the ever popular hairstyle trend, seen by the likes of Drew Barrymore & Klohe Kardashian and all the multitudes in between.

ombre hair trends, celebrity hair, drew

celebrity hair trends, ombre hair

As any trend goes, it has spilled over into home decor & furniture and I LOVE it!

I have had this tired old chair sitting in our garage for weeks and I had lost all inspiration for it.  I knew I wanted to do something different from the chairs I've done in the past.  Then yesterday it hit me...Ombre!!


I picked up 3 cans of spray paint and if you've read my paint reviews post then you know spray paint is not my first choice, but for this type of project I knew it would be perfect.


So here she is...


fabric seat cover, ombre chair, ombre furniture, painting furniture


ombre, chair, spray painting furniture

What do you think? Do you love the Ombre style as much as I do?

Linking up here and I will be sharing this project over at Mom's Fun Money.

Candy Topiaries

Saturday, December 10, 2011

Hope everyone is having a great weekend!  The sun is shining and everyone is good and healthy at our house, which means it is a weekend of cleaning, tree decorating, catching up on projects and finishing our outside lights!
I thought I would share with you today a very simple Pinterest inspired topiary that I just completed.


I started out with 2 clay pots (that only cost me 0.25 cents!) and spray painted them gold and a top coat of glitter. 

Then I cut a Styrofoam ball in half and hot glued it inside my pots.


Next I took my spray painted sticks and hot glued them inside the Styrofoam.  I put my other Styrofoam balls on top of the sticks to make sure they were centered.   I then covered them in colored duck tape (this is definitely a must do or you will have white spaces showing in between your candies.

I used Snow Drops that I got on clearance at Craft Warehouse to go inside my pots...


Now came the super tedious fun part!  Simply hot glue the thousands of candies...
Yes, I see the one escapee at the bottom ;-) 


I followed up the finished look with a coat of Polyurethane spray to keep the candies from melting and getting all sticky.

Here are my disclaimers if you choose to do this project yourself...

The large one is super top heavy because the genius making it didn't realize how heavy a million candies are for one piece of Styrofoam!  If I were to do it again I would advise a shorter or wider stick and something heavier in the pot to keep it down. 

Also if you are a perfectionist this may not be the project for you.  The little mints don't like to line up perfectly the whole way around.  I don't mind it at all, since I usually prefer things with a little bit of flaws ;-) but it may make some of you OCD gals crazy! 

Last bit of advice...make sure you buy way more candies than you think you will need.  I way underestimated the amount of mints I would need to make these.  I originally purchased 3 bags of red and green mix and I only had enough red to finish half of the little one.  I ended up going to the store 3 times for mints! 

I will also fully admit that I have one more topiary sitting in my garage waiting for mints, but I have no motivation to do it right now because it took me so long to glue the little suckers on ;-) 

Most of you probably have a lot more patience, skill and common sense than I do and would most likely breeze through this project though...

I will also be linking up to these fabulous parties...
http://www.myuncommonsliceofsuburbia.com/ ; http://abowlfulloflemons.blogspot.com/ ; http://www.bluecricketdesign.net/ ; http://goodbyecityhellosuburbs.blogspot.com/ ; http://www.lilluna.com/ ; http://polkadotsonparade.blogspot.com/ ; http://sewmuchado.blogspot.com/ ; http://733blog.blogspot.com/ ; http://tearosehome.blogspot.com/ ; http://www.somewhatsimple.com/ ; http://thriftydecorating-nikkiw.blogspot.com/ ; http://www.houseofhepworths.com/ ; http://rhinestonebeagle.blogspot.com/ ; http://www.brandyscrafts.blogspot.com/ ; http://alliemakes.blogspot.com/ ; http://www.thrifty101.blogspot.com/ ; http://www.fingerprintsonthefridge.com/ ; http://whipperberry.com/ ; http://www.missmustardseed.com/ ; http://www.mysimplehomelife.com/ ; http://www.atthepicketfence.com/ ; http://frenchcountrycottage.blogspot.com/ ; http://www.stuff-and-nonsense.net/ ; http://commonground-debrasvintagedesigns.blogspot.com/ ; http://linda-coastalcharm.blogspot.com/; http://www.bedifferentactnormal.com/ ; http://niftythriftythings.blogspot.com/ ; http://morrowsunshine.blogspot.com/ ; http://www.bystephanielynn.com/ ; http://www.iheartnaptime.net/ ; http://www.flamingotoes.com/ ; http://sumossweetstuff.blogspot.com/
; http://sweetpeasandbb.blogspot.com/ ; http://www.laughloveandcraft.com/ ; http://www.thestuffofsuccess.com/ ; http://www.remodelaholic.com/ ; http://betweennapsontheporch.blogspot.com/; http://diyhshp.blogspot.com/ ; http://linesacrossmyface.blogspot.com; http://vanessascraftynest.blogspot.com ; http://kissedbyafrog.blogspot.com/ ; http://www.happyhourprojects.com/ ; http://www.homemakerinheels.com/ ; http://rocaandcompany.blogspot.com/; http://littlebighouseontheprairie1.blogspot.com/; http://funkyjunkinteriors.blogspot.com/; http://theartsygirlconnection.blogspot.com; http://todayscreativeblog.net/;http://twenty-eight-0-five.blogspot.com/; http://www.thegunnysack.com; http://caribbeanmissionarywife.blogspot.com; http://athomewithk.blogspot.com/; http://www.itsoverflowing.com/2011/12/christmas-blog-link-party-christmas.html; http://jane-adventuresindinner.blogspot.com/

Grey Hutch Up Cycle

Monday, November 7, 2011

Today I am sharing my Hutch Up Cycle over at Happy Hour Projects! I am so flattered that Adrianne has selected me to be her guest blogger today.  Here is a little preview of what I am sharing.

My lifeless hutch before her makeover...


And a little sneak peak of how she turned out...


I hope you will stop on over and read my guest post to see the rest :-))

Stalled...

Thursday, October 6, 2011

I am having the hardest time making decisions lately!  I have done so many projects on a whim because I am so excited and I rush to get it done without thinking it through...leaving me disappointed in a month because I know how I should have done them differently.  I end up wasting so much time and money re-doing things it is ridiculous!  My poor husband must think I'm crazy!! 

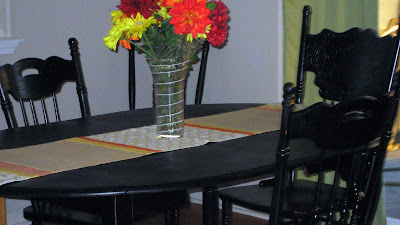
I spray painted my bedroom dressers and my dining room table black right when we moved into our new house and I can't stand them ;-/  I must have been going through a Gothic period ha ha!  It's kind of like the year I planted tulips in the fall and once spring came I realized I had all planted all BLACK! They were quite beautiful, but a little color mixed in might have been a good idea...


I know what colors I am choosing for the bedroom dressers, but I cannot decide on what to do with my table...


I'm almost embarrassed to show the picture
 I am thinking of possibly painting it white distressed and staining the top a dark walnut?  Or I may try just roughing up the black a lot more? Or doing a walnut stain with the black?  Or something completely different!!  Who knows...any thoughts...

Maybe I'm just the type of person who has to try something out before I can decide whether or not I like it?  In fact I seem to do this all the time with my clothes too!  I love them in the store and then I go to put them on the next day and wonder what on Earth I was thinking!  Maybe I have a problem??

I am just so fearful of re-doing my table again to have to re-do it again :-)  Kind of like my chairs...
at least they turned out okay after the days of frustration {I guess that's all that matters in the end}.


Hopefully I can get my act together this week and just make a decision, stay tuned...

Finally it's Autumn around here

Saturday, October 1, 2011

I took the plunge and threw out my summer flowers and replaced them with my Fall decor.  It was crazy how hard this was for me to do...many of my flowers were still in bloom, but they were definitely wilted and probably only going to make it another week, so I decided to just make it time. 

Since this is the only Autumn inspiration I have inside my house I decided to make my front porch rustic and festive.


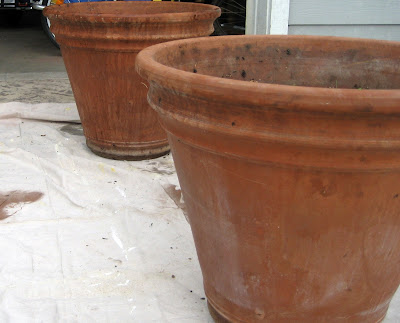
I started out by throwing out my old summer flowers :-((  and taking these old clay pots and transforming them with a little spray paint into something I actually like.


 I always loved the little frog feet on these pots, but I was just not into the dirt clay look...


And I suppose the fall Mums aren't so bad either ;-)


Then I remembered the $3 yard sale ladder I have sitting in the garage.  It is perfect for my front porch and my pumpkins!


I also picked up a wreath at Michael's and hot glued some pine cones and misc. things to it and made my own Autumn wreath.  The best part is there are very few Autumn pieces (like the little pumpkins) that I can just remove and replace with something Christmasy soon!!


I also forgot about these perfect little pillows I bought on clearance at Lowe's at the end of summer that I was saving for next year that are perfect for my front porch.  Sometimes I wonder why it takes me so long to realize these things...


So now the finished project...

P.S. please ignore the blue chalk, I have to let the girls have a little fun while we work outside :-)


I love it all...but it is really sad because all I keep thinking about is my Christmas decor, ha ha!

Hope everyone is having a fabulous weekend so far!

Check out this post featured at http://www.momsfunnmoney.com/!

Linking up to these fabulous parties...
http://www.myuncommonsliceofsuburbia.com/ ; http://abowlfulloflemons.blogspot.com/ ; http://www.bluecricketdesign.net/ ; http://goodbyecityhellosuburbs.blogspot.com/ ; http://www.lilluna.com/ ; http://polkadotsonparade.blogspot.com/ ; http://sewmuchado.blogspot.com/ ; http://733blog.blogspot.com/ ; http://tearosehome.blogspot.com/ ; http://www.somewhatsimple.com/ ; http://thriftydecorating-nikkiw.blogspot.com/ ; http://www.houseofhepworths.com/ ; http://rhinestonebeagle.blogspot.com/ ; http://www.brandyscrafts.blogspot.com/ ; http://alliemakes.blogspot.com/ ; http://www.thrifty101.blogspot.com/ ; http://www.fingerprintsonthefridge.com/ ; http://whipperberry.com/ ; http://www.missmustardseed.com/ ; http://www.mysimplehomelife.com/ ; http://www.atthepicketfence.com/ ; http://frenchcountrycottage.blogspot.com/ ; http://www.stuff-and-nonsense.net/ ; http://commonground-debrasvintagedesigns.blogspot.com/ ; http://linda-coastalcharm.blogspot.com/; http://www.bedifferentactnormal.com/ ; http://niftythriftythings.blogspot.com/ ; http://morrowsunshine.blogspot.com/ ; http://www.bystephanielynn.com/ ; http://www.iheartnaptime.net/ ; http://www.flamingotoes.com/ ; http://sumossweetstuff.blogspot.com/ ; http://sweetpeasandbb.blogspot.com/ ; http://www.laughloveandcraft.com/ ; http://www.thestuffofsuccess.com/ ; http://www.remodelaholic.com/ ; http://betweennapsontheporch.blogspot.com/; http://diyhshp.blogspot.com/ ; http://linesacrossmyface.blogspot.com/2011/09/cure-for-common-monday-10.html ; http://vanessascraftynest.blogspot.com/search/label/Do%20Something%20Crafty%20Friday ; http://kissedbyafrog.blogspot.com/ ; http://www.happyhourprojects.com/ ; http://www.homemakerinheels.com/ ; http://rocaandcompany.blogspot.com/; http://mushkiloves.blogspot.com/ ; http://www.jaqsstudio.com/ ; http://twenty-eight-0-five.blogspot.com/; http://funkyjunkinteriors.blogspot.com/


Spray Paint Love

Tuesday, September 6, 2011

I hope everyone had a great Labor Day weekend!  We took the girls camping and had a fabulous time! 


off fishing :-)
 
gotta love the camping hair!
I am so excited to share with you that Katie at http://momsfunmoney.com/ will be featuring one of my posts each week.  She has a great site with many cost saving coupons, recipes, and fun ideas! Check out her site or follow her on facebook.

Now on to my post...

I was all excited to come back and do a DIY sunburst mirror tonight and unfortunately things are just not working out for me.  I have had the materials for this project sitting around for a month now and have yet to start it.  I decided when I was cleaning house to just put them up until I was ready.  I always seem to put things away so well so that the girls won't get to them that I can't find them either!  It makes me crazy!  I found everything, except for the mirror (which is kind of key to the project).  What I really want to know is why I would split them up??  Why put everything, besides the mirror in one spot??  Sometimes my logic just amazes me.  I know it is in the perfect spot so that it won't get broken...but until my memory comes back to me, I will just have to move on...
I recently had some challenges with some chairs I was working on that reminded me just how much I {LOVE} spray paint!  I struggled with these chairs and wasted hours of time until I remembered about my good ol' friend, spray paint!  It is amazing how some times I can get stuck on one thing and forget that there are other ways of doing things.  Spray paint saved the day on this one and I must say I love the outcome!


Spray paint is the best choice for so many projects because it is quick and easy and really effective for the hard to get areas, like the wicker part in chairs.  I have used spray paint for large projects, like our kitchen table...

  
before...
 
after
and for small projects like this stool...


Although spray paint is an amazing choice for some projects, it is not always the winner.  I would never get results like this dresser from spray paint...


But for some projects, spray paint makes the world a much better place :-)


Chair makeovers are complete!!

Wednesday, August 24, 2011


I am so excited to not only put this project behind me (click here to see why), but because I am finally happy with the outcome...


Before


After
I am not sure where these chairs will stay because they actually work in multiple rooms, unlike the first 3 attempts...For now I have one in the living room and one in the Master bedroom.  I am just happy they are finally out of the garage and that my favorite fabric is put to good use :-))


The final product of these chairs was actually so easy and took very little time.  I just used Ace Premium Primer spray paint in Red Oxide and finished it with a coat of Ace Clear Cote Gloss spray paint.  When spray painting I normally use a primer and follow with the color I want, but in this case the only color I could find that I wanted was in the primer.  This turned out just as I wanted though.  For the seat I just unscrewed the old seat, vacuumed it off and stapled my new fabric on :-)  How much easier could it be.  Now if only I started out on the easy road the first time...


I'm linking up to these parties...